StarDot DVR runs as a single application with a single screen. This makes viewing, recording and playing back video simple and intuitive. There are four main areas on the screen:
- Device List
- Viewing Window
- Playback Controls
- Status Bar
The areas are defined below:
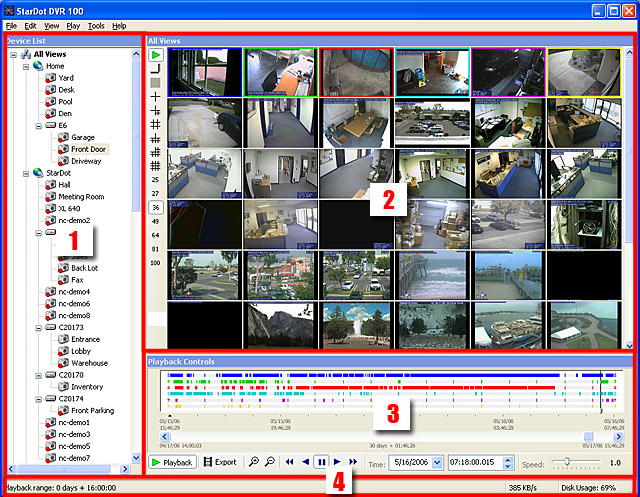
1. Device List
This is a "tree" style list of cameras. There is a main tree entry, called "All Views", which you can double click to view all cameras in your list, up to 16 (or 100 on the 100-camera version). The device list can contain up to 1024 cameras.
2. Viewing Window
You will see live camera views here, and you can select a window and choose to play back any recorded images for that view. When viewing multiple cameras, you can double click on a camera to enlarge it.
3. Playback Controls
When you select one or more cameras in the viewing window, you can click on the "Playback" button here and a graph of the recorded data for the views you chose is displayed in this area. The controls used for playback are then enabled, and you can view your recorded images playing forward or reverse at variable speeds, or you can drag the slider bar to a position in time. You can also search for a specific time by entering the date and time. The zoom buttons allow you zoom in and out of the recorded data timeline. You can also export the current timeline as a video file.
4. Status Area
Information on bandwidth, disk usage and playback range can be seen here